Showing posts with label Recipes. Show all posts

Tuesday, March 1

Savvy Sister Recipe: Banana-Chocolate Chip Waffles


I posted this picture of my fabulous Banana-Chocolate Chip Waffles on the Savvy Sister Shops Facebook page and got some requests for the recipe! By the way, I didn't make such a large stack because we were extra hungry, this was my way of planning ahead and getting some breakfast foods in the freezer. Simple and easy to pull out of the freezer and warm on a busy school/work morning.

The stack above was a tripled version of this recipe:

Banana-Chocolate Chip Waffles

1 3/4 c. all-purpose flour
1 T. baking powder
1/4 t. salt
2 eggs
1 3/4 c. milk
1/2 c. cooking oil
1/2 banana sliced into small chunks
1/4 c. semi-sweet chocolate chips

Mix flour, baking powder, salt together. I also use powdered milk and (sometimes) powdered eggs in this recipe. If you use these too, mix them with the dry ingredients. In another bowl, beat eggs slightly. Beat in milk (or water if you used powdered milk) and oil. Add egg mixture to flour mixture all at once. Stir just until combined and then gently fold in banana chunks and chocolate chips.

Cook as desired on waffle maker. Serve hot with syrup, jam, powdered sugar- the works! These are fantastic on a weekend morning- delicious! Enjoy!

Tuesday, December 21

My Favorite Things: Easy Caramels


(WARNING: All sugar and fat ahead!) My mom gave me this recipe and I make it every Christmas now- without fail!

Here's the easiest caramel recipe you'll ever come across:

Caramels

1 1/2 c. brown sugar
1 1/2 c. white sugar
1 1/2 c. light corn syrup
1 1/2 c. butter (no imitations)
1 can sweetened condensed milk

Combine all ingredients in a large saucepan and heat to 235 degrees. (No more, no less.) Stir constantly. Pour into large cookie sheet to cool. Cut into squares and wrap in wax paper squares. Enjoy!

Tuesday, November 23

Cranberries (And what to do with them.)


These are two cranberry recipes that I make for Thanksgiving every year, without fail! They are both delicious and I think you'll like them, too.

First up, Cranberry Salsa. This recipe is from my sister, Emilee from the
Dixie Coupon Chicks. She and her blog partner, Heather, post awesome recipes every weekend. Emilee always brings the BEST recipes to family get-togethers, so you'll definitely want to check it out!

Cranberry Salsa

1 12 oz. package cranberries, rinsed
3/4 c. sugar
1 medium jalapeno pepper
3 green onions
2 T. fresh cilantro or 1 t. dried cilantro
1 t. cumin

Place all the ingredients in a food processor and pulse until chopped and blended. Serve over cream cheese with tortilla chips. We usually have this delicious item as a Thanksgiving appetizer.

Next: Whole Cranberry Sauce. I grew up with canned cranberry sauce. As soon as I tried making my own cranberry sauce, I never went back! This recipe is courtesy the back of the cranberry package.

Whole Cranberry Sauce

1 12 oz. package cranberries, rinsed
1 c. sugar
1 c. water

Boil the water and sugar together in a saucepan. Add the cranberries and bring back to a boil. Simmer for 10 minutes and stir frequently. Beware: the cranberries will pop! Let cool at room temperature and then refrigerate. Serve with your favorite Thanksgiving dishes. (Mine would be turkey.)

The nice thing about cranberries is that you can buy the bags on sale this time of year and store them, as is, in the freezer. They will freeze for a whole year so you can have your favorite cranberry recipes all year long. Enjoy!

Tuesday, October 26

Sugar Cookies


Halloween just isn't Halloween to me without pumpkin-shaped sugar cookies! Here's our favorite family recipe. These have a "secret" ingredient to make them extra soft: sour cream. (Thank you Marysvale Cookbook published 1977 and Helen Gibbs!)

Old Fashioned Soft Sugar Cookies

3 1/4 c. flour
1/2 t baking soda
1 T. baking powder
1/2 t. salt
1/2 c. soft margarine (probably even better with butter)
1 c. sugar
2 eggs
1 1/2 t. vanilla
Dash of nutmeg (optional)
1/2 c. sour cream

Sift together flour, soda, powder, and salt in large bowl. Combine margarine, sugar, eggs and vanilla. Beat on high speed for 2 minutes. Add sour cream, then flour mixture, gradually, while beating on medium speed about 2 minutes. Chill dough. Roll on lightly floured surface to 1/4 inch thick. Cut with floured cookie cutter. Bake at 400 degrees for 8-10 minutes.

Yum! I doubled this recipe to share with friends. I also like to take my butter frosting recipe and add cream cheese to the butter mixture. Cream cheese makes everything taste better, right?

My kids love to help with these- that's why mine look less than perfect. That's what the holiday is all about!

Monday, September 27

Easy way to stretch hamburger!

As soon as I "dared" try this method of stretching out my hamburger meat, I haven't gone back! You soak wheat kernels, boil them for an hour and then mix them in with your ground meats. The wheat will naturally soak in the flavor & color of the meat, so you can easily slip this into your foods without your family knowing!

This is super easy and a handy way to make your hamburger last longer than usual. Here's how to do it:


Step 1: Soak 1 cup of wheat kernels in cool water overnight or for 12 hours. When I buy a big pack of hamburger (the most economical way to go), it goes in the fridge. I then soak the wheat kernels that night.

Step 2: When the 12 hours are up, drain and rinse the wheat kernels. Place the wheat kernels in a sturdy cooking pot and cover the kernels again with water. Boil for 1 hour.


Step 3: Place several pounds of hamburger in your browning skillet. I usually brown about 4 lbs. of hamburger at once. This saves so much time later!

Add the cooked wheat kernels to the hamburger and cook as desired. You may also add onions, peppers, and spices to your hamburger at this point, if desired.


Step 4: Whalaa! You've cooked all your hamburger so it's ready at a minute's notice! You've also found a way to use your food storage and make your meat a little bit healthier.

I like to divide the hamburger into 1 1/2 cup- 2 cup portions, place the portions in freezer bags and freeze. When it's time to make spaghetti sauce, tacos, or sloppy joes- the hamburger is ready to go.

I've been using this easy method of cooking and freezing hamburger for about a year now. My son is the only one that has said anything about the wheat. He saw it on a cheeseburger pizza and asked me what it was. I said, "It's part of the meat." He bought it and I haven't heard a thing about it since!

What handy tips do you have for stretching your food? Do you like to hide healthy foods and vegetables in your regular diet? How about any hamburger tips? Please leave a comment and share with us!

Tuesday, September 14

FREE Cream Cheese at Wal-mart + a Cranberry Salsa Recipe!

The "word" out there is that Kraft Philadelphia Cream Cheese is on rollback at Wal-mart for only $1 each! Use the $5/5 Kraft products coupon and get 5 bricks of cream cheese for FREE!

Thanks, Couponing 101!

Wow... wondering what to do with all that cream cheese? Well, it is football season- make your favorite dips this fall! Cream cheese can also store in the refridgerator for a long while- it may even make it into your Thanksgiving pies!

Here's my favorite recipe using cream cheese- Pour this Cranberry Salsa over it and enjoy it with tortilla chips! Thanks to my sis Emilee at
Dixie Coupon Chicks for this fabulous recipe!

1 12 oz. pkg. cranberries, rinsed
3/4 c. sugar
1 medium jalapeno
3 green onions
2 T. fresh cilantro or 1 t. dried
1 t. cumin

Put all ingredients in a food processor and pulse until chopped and blended. Serve as suggested above. Enjoy!

Thursday, September 2

What to do with chicken... guest post!

It seems as though I'm always running into GREAT chicken deals at Target! I asked Audrey at Tight Wad in Utah to write up a guest post on what to do with these great chicken deals. If you don't know Audrey yet- she is definitely a blogger you will want to know. She's an expert at matching up sales items with delicious recipes!

What to do with Chicken Thighs

I'm Audrey with Tight Wad in Utah. I always end up getting chicken thighs for really cheap. Here are a couple of my favorite thigh recipes so when you stock up you'll know what to do with them all. :) To see more "what to do with...." recipes go here.

Crumb Coated Chicken Thighs


1/4 c dry bread crumbs
1 t salt
1 t ground cumin
1 t paprika
1 t chili powder
1 t curry powder
1/4 t pepper
8 chicken thighs, skin removed
throw all the dry ingredients into a plastic bag and shake
coat thighs a couple at a time
Bake at 400 on greased baking sheet for 15-20 minutes. Turning half way through.


This recipe is really amazing. I consider this one guest worthy. :)

Crockpot Chicken Thighs

This one has crazy ingredients but it is soooo good.


8 chicken thighs, skin removed
16 ounce salsa
1/2 c peanut butter
2 t ginger
2 T soy sauce
2 t lime juice
throw it all in a crockpot on low for 6-8 hours
garnish with cilantro, scallions, and peanuts (I just did peanuts)
serve over rice

Thanks, Audrey! These all look fantastic!

Wednesday, August 25

Creamsicle Slushies with FREE Greek yogurt!


Grab your FREE Vanilla Greek Yogurt at Smith's this week (don't forget the .30/1 coupons that pay for your FREE yogurt!) and use the yogurt in this yummy recipe!

My daughter found this recipe in the Family Fun Magazine and she served it at a little summer party. I LOVED it and the kids did, too!

Step 1: Pour 1 1/3 c. orange juice into ice cube trays and freeze until solid.

Step 2: Empty the tray of ice cubes (or "orange cubes") into a blender or food processor and combine with 1 T. honey, 1 c. vanilla nonfat yogurt, and 1/4 c. frozen orange juice concentrate.

Step 3: Blend until smooth.

Step 4: Serve and enjoy!

You could also make these into smoothie pops, I like this recipe over at
Tight Wad in Utah- she uses the FREE yogurt in her recipe as well! Trust me, these are SO GOOD!

Monday, July 26

For Dinner Tonight.....

I wanted to try something new for dinner tonight. I had my in-laws over for dinner, so this was a little bit brave for me! I couldn't get Ale's Rice Cakes out of my head, so I decided to just go for it!


The final result? Well, I think I needed a bit more flour- mine don't look as round as hers. Mine look like mini hash browns! No matter how they looked, they tasted delicious! I HIGHLY recommend these- everyone, including my kids and my in-laws really loved them! I made mine with ham, onions, and cheese and served them with the FREE French's Honey Mustard Dipping Sauce I got awhile ago at Family Fresh Foods. I can't wait to try more toppings and sauces next time!

Wednesday, July 21

Cream Cheese Recipes


What will you do with your FREE (or moneymaking) cream cheese from Smith's? If you need a few ideas, check out this guest post on Tight Wad in Utah! All I can say is.... yum!

Wednesday, July 14

How I Cook- Guest Post & Giveaway!

I'm super excited to have Ale from How I Cook as a guest post today! She's posting one of her cooked rice recipes, Rice Cakes!

Did you catch
Ale on Good Things Utah last week? WOW! Isn't she creative? That Brazilian Meatloaf is killer- I can't wait to try it on my family. Thanks, Ale! Be sure to read to the end of this post, Ale & How I Cook are sponsoring a giveaway for YOU- the Savvy Sister Shops readers!


Rice Cakes

1 egg

½ c milk

2 c cooked rice

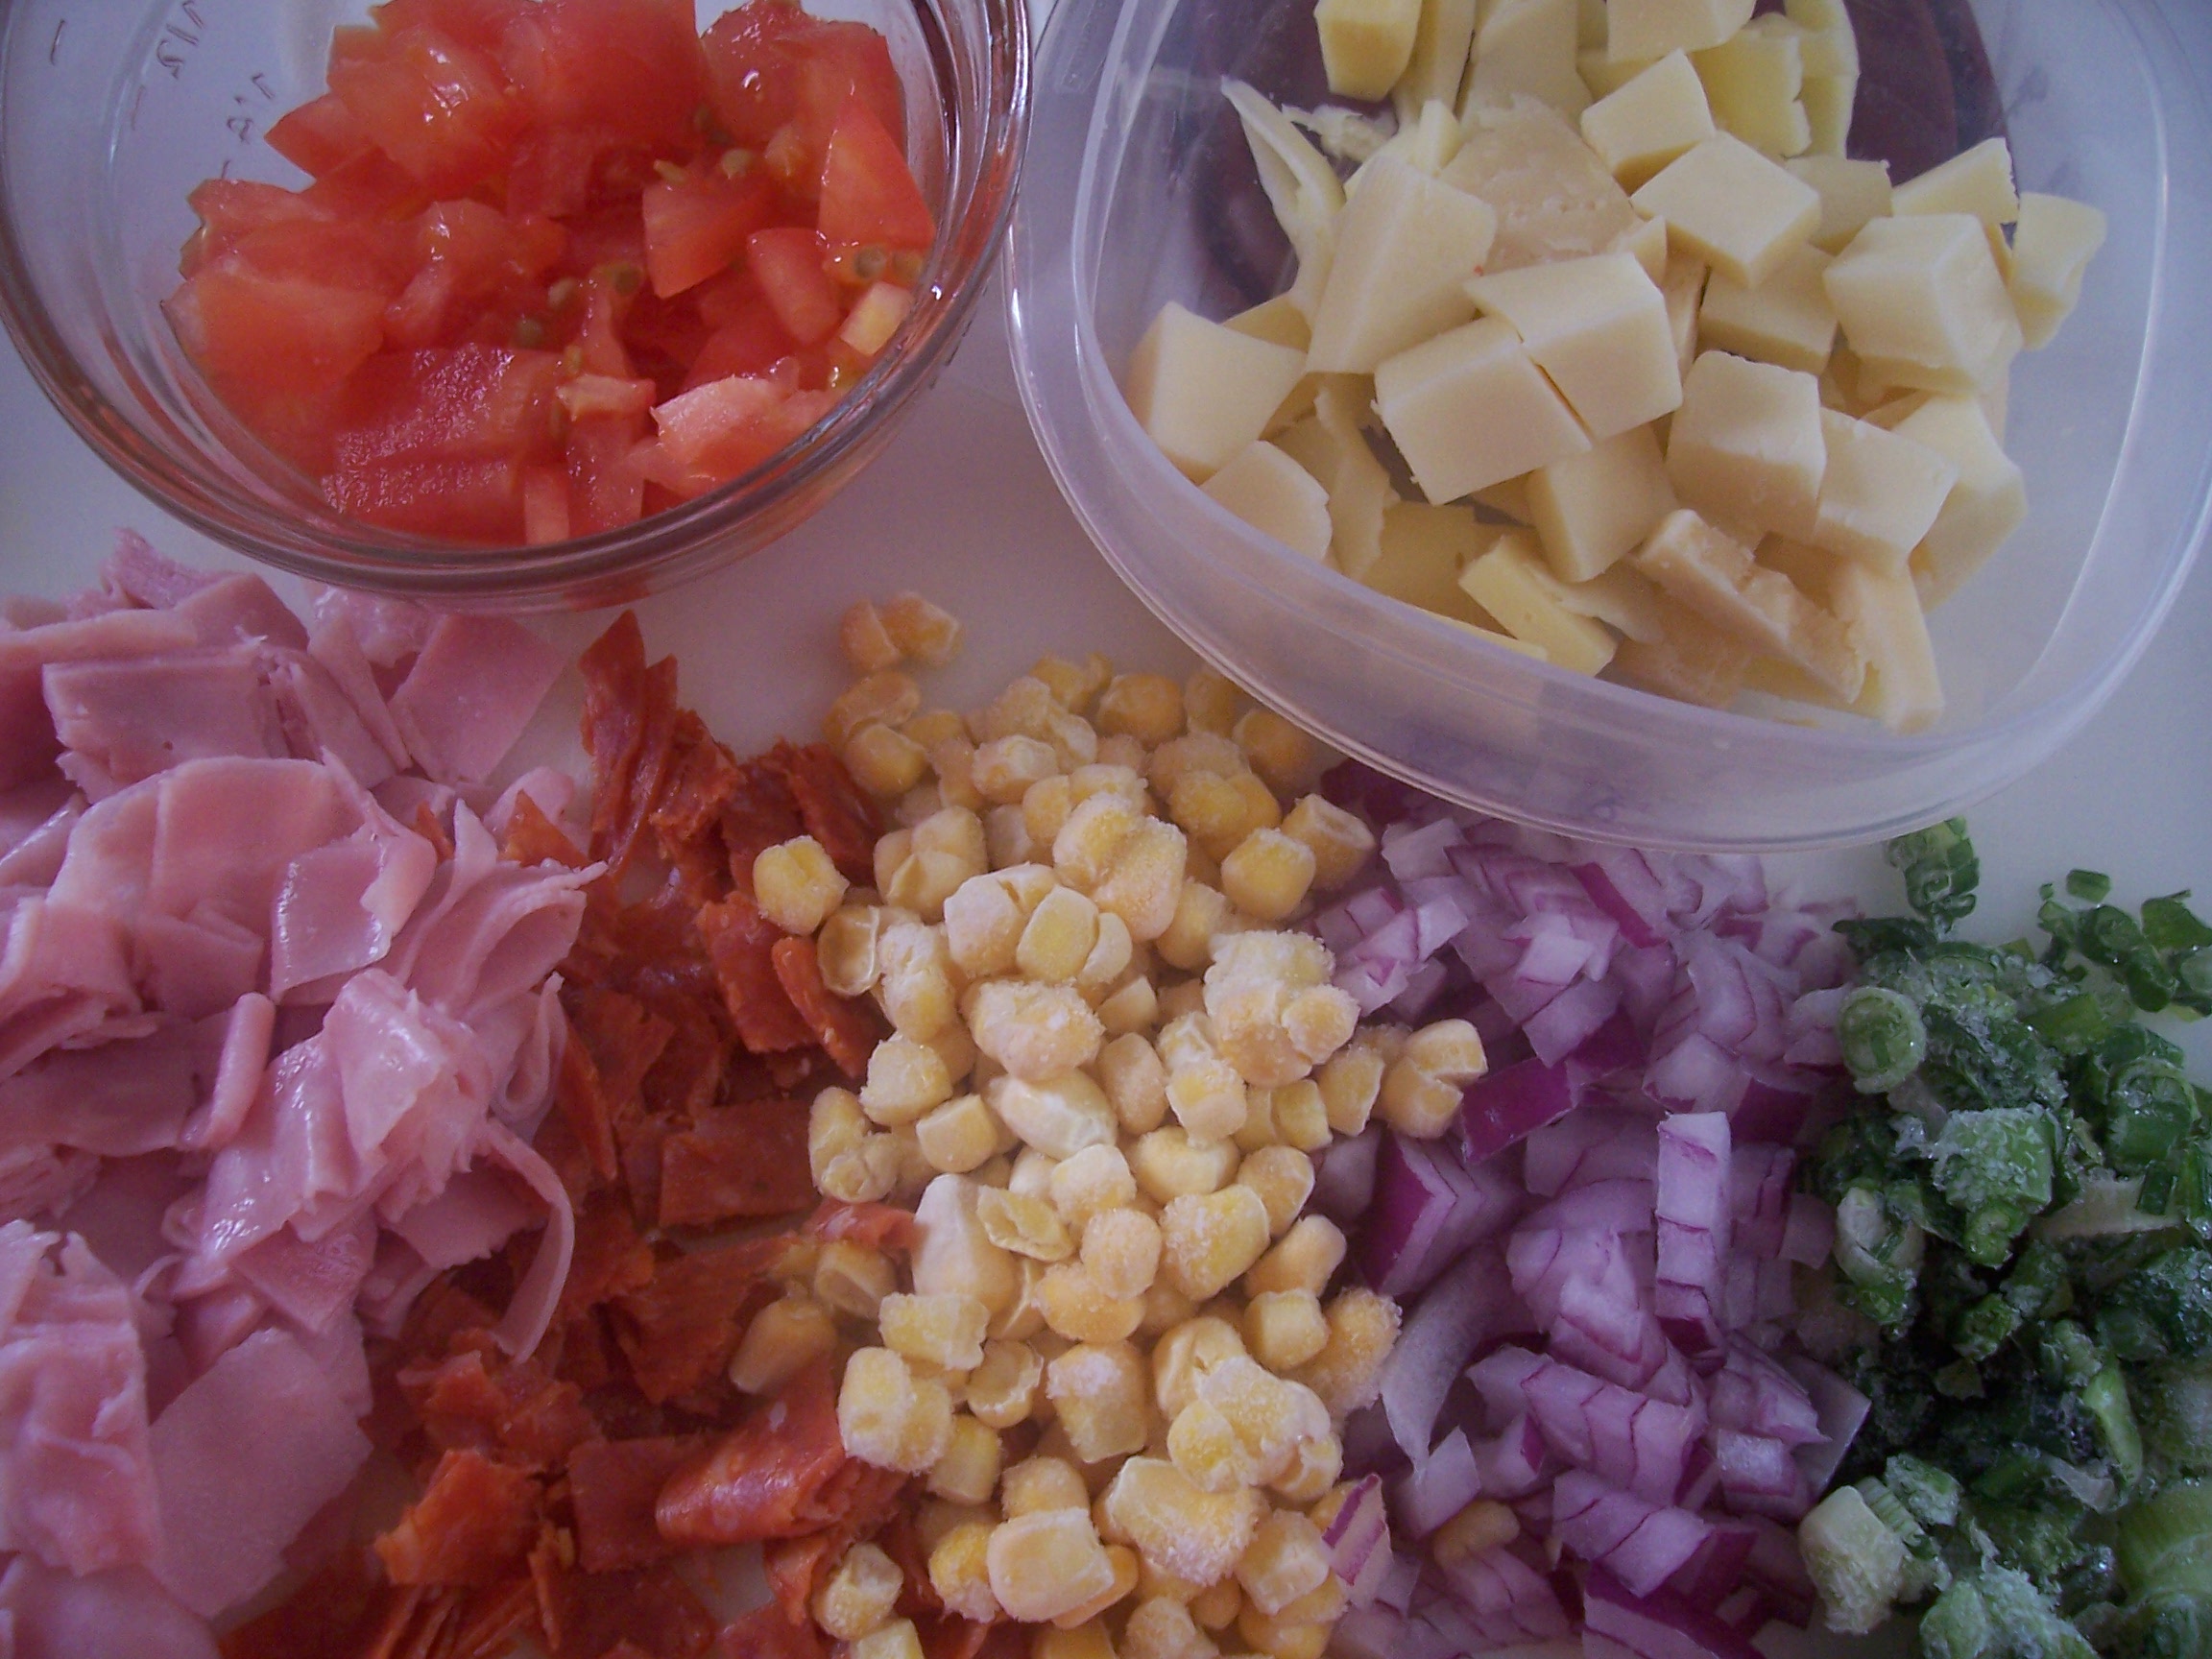
½ c cut ham slices

¼ c cut pepperoni

¼ c corn

¼ c cut tomatoes

¼ c onions (diced)

2 T green onions (diced)

½ c cheese (either cubed or sliced)

Pepper to taste

1 t baking powder

2-4 T flour

In a blender, add egg, milk and rice. Blend it until it mixes well and most of all the rice are dissolved. It will have a thick pancake like texture.


Transfer it to a mixing bowl and add the rest of ingredients except the flour. Mix in 1 Tablespoon of flour at a time until you get the correct consistency. It will be thick enough to hold its shape in the spoon and not run out. It will not be thick enough to roll in your hand.


In a frying pan, heat some oil (enough to cover the bottom of the pan). Shape the rice cakes with a spoon and drop them into the oil.


Fry both sides until they are golden brown.


Serve them with your favorite sauce.


Mixing ideas: ham, pepperoni, corn, onion, cheese, olives, broccoli, green peppers, tomatoes, turkey, bacon, carrots


Sauce ideas: BBQ, Honey Mustard, Mayo Dill, Fry Sauce, Ranch, Yogurt Sauce, Marinara, Sweet and Sour


BBQ: Same amounts of ketchup and brown sugar. Heat for about 1 minute in the microwave. Mix well.

Honey Mustard: 1 measure of honey to 2 measures of mustard (I used 1 T honey and 2 T of Dijon Mustard, but you can use any mustard of your liking)

Mayo Dill: 1 T mayo, 1 T sour cream


Okay, I love all the ideas for the sauces and mixing ingredients, these are sweet, Ale- thanks!


And now, for the Savvy Sister Shop Giveaway sponsored by How I Cook!

A Set of 6 Prep bowls!

I love these prep bowls. You can do so much with them. As you saw on the recipe above, you can use them to serve sauces. You can save time by preparing the sauces ahead of time or you can use the prep bowls to store prepared ingredients. The prep bowls are also great for melting butter, as well as chocolate, in the microwave. Bake mini cakes, corn muffins, store leftovers and so much more! Prep bowls are made of glass and they measure 1 cup to the rim. Bowls are dishwasher, freezer, microwave and oven safe up to 350°F; lids are dishwasher-safe.

Thanks so much, Ale!

Okay, ladies- in order to win the set of 6 prep bowls, you can enter in 4 ways:

1. Be a fan of Savvy Sister Shops on Facebook.

2. Be a fan of How I Cook on Facebook.

3. Leave the comment "Prep Bowls!" on the How I Cook Facebook page.

4. Leave the comment "How I Cook" on the Savvy Sister Shops Facebook page.

So that's it- be the fan of 2 pages and leave a comment on each page. If you get the comments mixed up, don't worry, it will still count! Please just leave 1 comment on this post this time with your name- the same name you have listed on Facebook, so we can check our fan pages!


Good luck! You have until next Monday, July 19 at 4 p.m. to complete the 4 entries- EASY, right? One lucky winner will have the prep bowls in no time!

Wednesday, June 9

Tonight I made....


Tonight I made a presentation on using your powdered milk in your foods. I made yogurt from powdered millk and granola to top it. I also made a mock mozzarella cheese. I mixed the mock cheese with real grated mozzarella and I put those together with onions, tomatoes, and olive oil. All these ingredients topped Ritz crackers for a mini bruschetta appetizer! Mmmm.... they are so tasty!

It was actually a little refreshing to be asked to teach a class that's not about coupons.... well, maybe just this once!

Also, if you are willing to mix up your own milk, this is a great money saver! I used to think that dried or powdered milk was fake milk. It's not! It's dried milk, without the water- just add water and whalaa! Milk! I figured the cost of 1 gallon of skim milk to cost just 67 cents when you mix it yourself. The cost of a gallon of 2% milk is only $1.17. You can get used to the new taste by mixing it with the milk you normally use. Add more and more of your powdered mix until you and your family are used to it. This is another great way to save money.

Friday, June 4

Look at my wheatgrass now!


Remember my wheat sprouts project? Well, I let them grow into wheatgrass! It's amazing to see how fast they grow. The above picture was on Day 6 and now look at them!

Below is Day 10- ready to harvest. I'm going to cut some and blend it into smoothies- I'll let you know what the family's reaction to that is! I love making undercover healthy foods- LOVE it!

Saturday, May 29

Recipe of the week: Sprouts!


You all know that I grind wheat to make Homemade Bread, Pancakes, and Pizza Dough. What's this latest project? It probably looks like brownies with chopped nuts, right? Well, this week I decided to get WAY out of my comfort zone and try to sprout wheat. Wheat is amazingly versatile and a very inexpensive addition to your menu items.

This is how you do it.

Step 1: Rinse your wheat kernels and soak in water for 12 hours.


This is what the wheat kernels look like after they have been soaked. Nice and plump!

Step 2: Fill a tray (or in my case, a cake pan) with an inch of wet soil. Sprinkle the soaked kernels onto the soil (as in the top picture) and cover with newspaper 3 pages thick. Leave covered until the roots start to go into the soil. Water every day or two.


These are my sprouted wheat kernels on Day 3. I have to admit this is a little bit scary for me. Maybe it's because they look scary?!

I wonder if we will use these and actually eat the sprouts? They will be yummy in a wrap or in sandwiches. To harvest the sprouts, just cut with scissors near the roots.

If I let it grow for 10-12 days, we will have wheat grass. This is extra nutritious and I'm thinking about cutting some and hiding it in smoothies. Have you grown wheat sprouts? Do you have any insight into this project? Now you know how to do it, if you've never done it before! I'll keep you all posted on this new project.

Saturday, May 22

Recipes of the week: Chicken Enchiladas & 7-layer dip


Mmmm... one of my favorite dinners! Here's my recipe for Chicken Enchiladas:

Before you begin, decide how you'd like to warm up the corn tortillas. If they are not warm, they will break! I wrap the 12 corn torillas in plastic wrap and warm them in the microwave. If you prefer to warm them slowly, wrap them in foil and place them in a 350 degree oven for about 10 minutes.

For the sauce, cook together:
2 T. margarine or butter
1/2 c. chopped onion (I use my dehydrated onions)
1/2 t. garlic salt
Cook until onion is soft and tender.

Meanwhile:
Stir 3 T. all-purpose flour into 8 oz. carton sour cream. Add this mixture to the onion/butter mixture.

Next, stir in 2 c. chicken broth and 1 4 oz. can diced green chili peppers all at once. Cook and stir this sauce until it is thick and bubbly. Remove from heat and add 1/2 c. cheese (I prefer Monterey Jack.)

Next, stir 1 c. of this sauce into 3 c. chopped chicken or turkey. Place about 1/4 c. filling inside each tortilla like so:
Place your rolled tortillas into a greased pan:
Top with the remaining sauce.
Bake, covered, at 350 degrees for 35 minutes. **OR place these in the freezer for a quick meal later! I often make double and have one for later. Sprinkle with 1/2 c. cheese during the last 5 minutes. Let stand for about 10 minutes before serving. Top with olives and tomatoes, if desired. I like to serve mine with salad and spanish rice as seen in the top picture.
And... for a special treat- 7 layer bean dip! My husband and I get this all to ourselves when I make it- no one else in the family likes it!
For my seven layers, I use:
Layer 1- Refried Beans + Salsa mixed (The amount depends on how spicy you like it! I usually add 1/2 c. salsa to 1 can of refried beans)
Layer 2- Guacamole or mashed avocados
Layer 3- Sour cream
Layer 4- Shredded cheese
Layer 5- Lettuce (I tear it into teeny-tiny pieces.)
Layer 6- Chopped tomatoes
Layer 7- Chopped olives
I hope you enjoy these yummy recipes!

Saturday, May 8

Breakfast in bed for Mom!

All Moms get breakfast in bed tomorrow, right? At least that's what I expect every year.... I love it! Here are a few ideas to send on to your kids and hubby.


Whole Wheat Blender Pancakes
Mmmmm.... these are so yummy!

Place in a blender at high speed for 2-3 minutes:
1 1/2 c. milk
1 c. wheat (uncooked)

Add the following and blend 1 minute more:
1 egg
1 t. salt
1/3 c. oil
3/4 t. baking powder
2 T. sugar or honey (I recommend honey!)

Cook on hot griddle. Serve with your favorite toppings.

I make a few variations on this recipe. My blender broke, so I grind the wheat and then let it soak in the milk for about 10 minutes. This prevents crunchy pancakes! I also use powdered eggs and powdered milk- it's extra economical and no one can tell the difference.


Quiche Lorraine
Another favorite of mine and a fantastic idea for Mom!

Make or buy a pastry for a single-crust pie

If you make your own pastry, line the unpricked pastry shell with a double thickness of heavy-duty foil. Bake in a 450 degree oven for 5 minutes. Remove foil. Bake for 5-7 minutes more or until pastry is nearly done. Remove from the oven. Reduce oven temperature to 325 degrees.

Meanwhile, cook 6 slices of bacon and set aside.

Also mix together:

3 beaten eggs
1 1/2 c. milk
1/2 c. chopped onion
1/4 t. salt
1/8 t. pepper

Toss together:
1 1/2 c. shredded Swiss cheese
1 T. all-purpose flour

Add the cheese mixture to the egg mixture and pour into the warm pie shell. Bake in the 325 degree oven for 45-50 minutes or until a knife inserted near the center comes out clean. If needed, cover the edges of the pie crust with foil to prevent overbrowning. Let stand for 10 minutes.

Don't forget these yummy options! Find German Pancakes recipe here and a yummy Crepes recipe here.

Saturday, April 24

Recipe of the week:White Chicken Chili


Mmmmm..... I love this recipe and found an excuse to make it again when the weather was cool again. It's a great combination of spicy and creamy. This is also a way to stretch out your protein budget, beans are a very inexpensive way to go!

White Chicken Chili
2 chicken breasts
1 can chicken broth (I use chicken bullion and water)
1 sliced onion (I use dehydrated onions)
1/2 t. garlic salt

Put these ingredients in stock pot (or use the crock pot if you're thinking ahead) and boil until chicken is able to be shredded. Take the chicken out, shred or cut and put back into the stock pot.

Now add:
4 cans white great northern beans (Or use your dried white beans, again you need to think ahead to do this!)
4-6 oz. jarred green salsa
1 can diced green chilies
12 oz. Sour Cream

Heat through. Serve with shredded cheese, additional sour cream and crushed tortilla chips, if desired. Enjoy!

Thanks to Emily C. for this recipe!

Saturday, April 17

Recipe of the week: Mint Brownies


Mmmmm... these are soooo good! I can brag on these, because they are not my recipe. A big thank you goes out to my friend Crystal for this brownie recipe! These are my flagship, premium, signature, best-ever dessert that I make when I want to impress friends and family. Maybe it's because of all that butter? Hmmm.... butter, of course, makes them taste the best, but you could use a substitute as well! My family regularly requests these for get togethers. I hope your family loves them too!

These are made in three parts (for the three layers) and refrigerated after each part is made.

Layer 1: Brownies

Boil together in a heavy saucepan:
2 cubes butter (1/2 lb.)
1 cup water
4 Tbs. Cocoa

Meanwhile mix together the dry ingredients:
2 cups flour
2 cups sugar
½ tsp. Salt
1 tsp. Baking soda

When chocolate mixture has come to a boil, take from heat and immediately add to the dry ingredients.


Then add:
½ c. sour cream
2 eggs

Mix well. Batter will be quite thin. Pour into greased and floured 10” x 15” cookie sheet with sides. Bake for 20-25 minutes at 375ºF. Let cool completely. (I put them in the fridge to speed the process up a bit.)

Layer 2: Mint Icing

3 c. powdered sugar
¾ c. butter, softened
1 t. Mint extract
1 ½ - 2 T. Milk
Green food coloring

Cream ingredients together and spread on cooled cake. Refrigerate.

Layer 3: Glaze
1 ½ cups semi-sweet chocolate chips
1 cube butter (1/2 c.)

Melt chocolate chips and butter together. When cool but still spreadable, spread over mint layer.


Store covered in the refrigerator. These also freeze well. I hope you'll be able to taste why these are the best! Mmmmm, enjoy!


Want more recipes? Check out the Dixie Coupon Chicks 'Sweet Tooth Saturday' posts here and here. Also, Tight Wad in Utah specializes in showing recipes that match up with current sales items! She has a lot of fun recipes. Also, How I Cook- oh my goodness! All her unique dishes look so yummy! I also love her creative idea for making Dannon yogurt pops!

Saturday, April 10

Recipe of the week:Chicken Fingers

Our great deals don't mean a lot unless we convert the deals into actual meals! If you want to see all my Savvy Sister recipes, click here! This week's recipe is Chicken Fingers!

So easy and so yummy! My family loves it when I make these for dinner.

Just cut your chicken into strips and put into a bowl of milk.

Next, coat the chicken in flour, salt and pepper mixture. I don't even measure anymore, but use about 1 c. flour, 1 t. salt and pepper to taste.

After the chicken is coated, fry it in oil until golden brown on both sides.

Drain on paper towels or napkins and then enjoy! My kids love to dip these in honey. I like to cut them up and put them in a chicken taco or in a salad.

I hope you will try this easy and fun recipe!